
One of my lovely sisters is expecting a baby this winter – the first grandbaby for my parents! We are all super excited and are going to completely spoil this baby. I decided to make this quilt for my sister’s birthday, inspired by one that we both independently noticed in a fabric store here in Seattle. The store is Drygoods Design in Pioneer Square and they had an adorable quilt made with 4×4 squares of different floral fabrics separated by large squares of grey.
I started by collecting floral prints when I saw them – I got a some at Drygoods Design, some at Nancy’s Sewing Basket in Queen Anne, and some at District Fabric in Fremont. It was fun to have a collection of all-over-Seattle fabrics! I tried to get a variety of colours and a couple darker ones that would contrast more. I bought them in the minimum quantities (at some stores 6″ and at other stores 9″). I got half a yard extra of the yellow and red floral to use for the binding. I got some grey quilting cotton, some pale green flannelette for the backing, and some cotton-bamboo batting. And I managed to remember at the last minute to buy thread.
I wanted the quilt to be about 3’x4′ so I decided to do a grid of 12″ squares. I cut 24 strips of florals, each one 14″x3.5″. I pieced these together into six blocks of four, and then cut each block into four 3.5″ strips the other way. I then jumbled up these strips and pieced them again into six blocks, each a 4×4 grid.

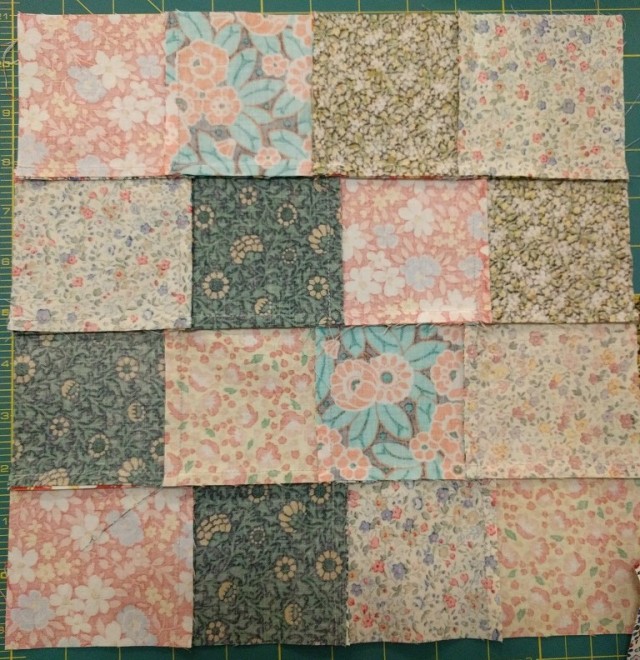
I read a little bit online about the neatest way to press the seams for this type of quilt. If you are sewing together two pieces that have seams lining up, it will lie flatter if the seams on the two pieces are pressed in opposite directions. In order to achieve this, when I pieced together the blocks of four strips, I pressed all the seams in one direction. Then when I cut them up and arranged the strips into blocks the second time, I made sure that if the top strip had its seams pressed to the left, the strip below it had its seams pressed to the right, and so on (see the picture below). Ideally you would be pressing towards the darker fabric but since I was using all different colours in no particular pattern it would have been too complicated so I didn’t bother. Luckily the seams aren’t visible through the lighter fabrics.
Once I had my colourful 4×4 blocks, they should have been all 12.5″x12.5″, but of course they were all a little shy. I still haven’t figured out why my pieces always end up short, but it didn’t matter much here because I just cut the grey blocks a bit smaller than 12.5″x12.5″. I pieced the blocks together into a grid, pinned the top to the batting and backing, and quilted it on my machine. The quilting was probably the trickiest part – it is hard to keep everything flat when the top layer of the fabric gets stretched out a bit differently than the bottom layer. I’ve heard that the spray glue that sticks the layers together and then washes out in the machine can help, so I’ll probably try that next time.
I cut 2.5″ strips of floral for the binding and machine stitched it to the front then hand stitched on the back, which was slow but gratifying! I’m very happy with the way the binding turned out.

This was a lot of fun to make and has inspired me to do more sewing! I find sewing projects move a lot faster than knitting – it just takes a bit of momentum to gather the materials and pattern and get cutting.
Hopefully this quilt keeps my future niece or nephew cozy this winter!


